


Now Reading: AutoCAD Lesson 108 – Isometric Drawing
1
- 01
AutoCAD Lesson 108 – Isometric Drawing


After we watched and learn from previous lesson 107
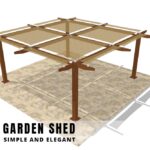
Let’s take a look these next Topic. We finish our simple plan and elevation, these time we will going to create isometric drawing in 2Dimensonal. See video below!!
Follow step by step
- Command: UN (UNITS) Verify unit and set to Millimeters
- Command: DS (DSETTINGS) Verify Set be sure to set into isometric snap See video..
Press F5 to toggle between isometric plane… Left, Right or Top Plane.
- Command: F5 (Follow the video posted above)
- Command: PL (PLINE) (see cursor direction) (Follow the video posted above)
Specify start point:
Current line-width is 0
Specify next point or [Arc/Halfwidth/Length/Undo/Width]: 300
Specify next point or [Arc/Close/Halfwidth/Length/Undo/Width]: 300
Specify next point or [Arc/Close/Halfwidth/Length/Undo/Width]: 300
Specify next point or [Arc/Close/Halfwidth/Length/Undo/Width]: c
- Command: EL (ELLIPSE) (Follow the video posted above)
Specify axis endpoint of ellipse or [Arc/Center/Isocircle]: i
Specify center of isocircle:
Specify radius of isocircle or [Diameter]: 20
- Command: Specify opposite corner or [Fence/WPolygon/CPolygon]: (Follow the video posted above)
Command: CP (COPY 1 found) (Follow the video posted above)
Current settings: Copy mode = Multiple
Specify base point or [Displacement/mOde] :
Specify second point or [Array] :
Specify second point or [Array/Exit/Undo] :
Specify second point or [Array/Exit/Undo] :
Specify second point or [Array/Exit/Undo] : Cancel (esc)
- Command: Specify opposite corner or [Fence/WPolygon/CPolygon]:
- Command: M (MOVE 2 found) (Follow the video posted above)
Specify base point or [Displacement] :
Specify second point or : 20
- Command: Specify opposite corner or [Fence/WPolygon/CPolygon]:
- Command: M (MOVE 2 found) (Follow the video posted above)
Specify base point or [Displacement] :
Specify second point or : 20
- Command: Specify opposite corner or [Fence/WPolygon/CPolygon]:
- Command: M (MOVE 2 found) (Follow the video posted above)
Specify base point or [Displacement] :
Specify second point or : 20
- Command: Specify opposite corner or [Fence/WPolygon/CPolygon]: (Follow the video posted above)
- Command: M (MOVE 2 found) (Follow the video posted above)
Specify base point or [Displacement] :
Specify second point or : 20
- Command: TR (TRIM) (Follow the video posted above)
Current settings: Projection=UCS, Edge=None, Mode=Quick
Select object to trim or shift-select to extend or
[cuTting edges/Crossing/mOde/Project/eRase]:
- Command: Specify opposite corner or [Fence/WPolygon/CPolygon]: (Follow the video posted above)
- Command: CO (COPY 8 found) (Follow the video posted above)
Current settings: Copy mode = Multiple
Specify base point or [Displacement/mOde] :
Specify second point or [Array] : 50
Specify second point or [Array/Exit/Undo] :
- Command: E (ERASE 3 found) (Follow the video posted above)
- Command: L (LINE) (Follow the video posted above)
Specify first point:
Specify next point or [Undo]:
- Command: TR (TRIM) (Follow the video posted above)
Current settings: Projection=UCS, Edge=None, Mode=Quick
Select object to trim or shift-select to extend or
[cuTting edges/Crossing/mOde/Project/eRase]:
- Command: F5
- Command: EL (ELLIPSE) (Follow the video posted above)
Specify axis endpoint of ellipse or [Arc/Center/Isocircle]: i
Specify center of isocircle:
Specify radius of isocircle or [Diameter]: 25
- Command: M (MOVE 1 found) (Follow the video posted above)
Specify base point or [Displacement] :
Specify second point or : 50
- Command: M (MOVE 1 found) (Follow the video posted above)
Specify base point or [Displacement] :
Specify second point or : 100
- Command: CO (COPY 1 found)(Follow the video posted above)
Current settings: Copy mode = Multiple
Specify base point or [Displacement/mOde] :
Specify second point or [Array] : 200
Specify second point or [Array/Exit/Undo] :
- Command: CO (COPY 2 found) (Follow the video posted above)
Current settings: Copy mode = Multiple
Specify base point or [Displacement/mOde] :
Specify second point or [Array] : 200
- Command: M (MOVE 3 found) (Follow the video posted above)
Specify base point or [Displacement] :
Specify second point or :
- Command: CO (COPY 3 found) Current settings: Copy mode = Multiple(Follow the video posted above)
Specify base point or [Displacement/mOde] :
Specify second point or [Array] : 400
Specify second point or [Array/Exit/Undo] :
- Command: L (LINE)(Follow the video posted above)
Specify first point:
Specify next point or [Undo]:
Specify next point or [Undo]:
- Command: CO (COPY 2 found) (Follow the video posted above)
Current settings: Copy mode = Multiple
Specify base point or [Displacement/mOde] :
Specify second point or [Array] :
Specify second point or [Array/Exit/Undo] :
Specify second point or [Array/Exit/Undo]
- Command: TR (TRIM) (Follow the video posted above)
Current settings: Projection=UCS, Edge=None, Mode=Quick
Select object to trim or shift-select to extend or
[cuTting edges/Crossing/mOde/Project/eRase]:
“Note: Follow the step first, after that you can experiment in you own way to make your work more faster and easy.“
Summary:
If you have finished reading and watching video posted above, we be able to make our first Isometric drawing. Congratulation!!! Another technique in drawing you can use to give life on your drawing for presentation “Remember this is still basics topic. But always keep in mind that mastery of this basics will lead us into advance.“
Share
Related Posts


Previous Post
Next Post


Loading Next Post...